I made it in to the hardware store today and picked up all the screws I will need to put it together (all matte stainless yet). Does that count?
-Ron
Where are we at?
Re: Where are we at?
![]() by ScrapMetal » Wed Apr 16, 2014 11:39 pm
by ScrapMetal » Wed Apr 16, 2014 11:39 pm
Wells-Index 860 Mill
South Bend 11" Lathe
Queen City Shaper
South Bend 11" Lathe
Queen City Shaper
-

ScrapMetal - Site Admin
- Posts: 225
- Joined: Thu Feb 02, 2012 3:39 am
Re: Where are we at?
![]() by ScrapMetal » Fri Apr 18, 2014 2:03 pm
by ScrapMetal » Fri Apr 18, 2014 2:03 pm
I did a little bit of assembly last night. I fit the bearing to the brass column as well as "pressed" the axle in to the crank shaft. The bearing assembly was a bit snug but a quick application of emery cloth and it slid right in. The axle/crank is a press-fit and by some miracle I got the hole the right size. To press the crank on I put the crank in the oven (wife was already in bed  Shhhh! What she doesn't know won't hurt me.) at 300° F for a half an hour. Once it was at temperature I simply took it out and pushed the axle in by hand. Wear some gloves or oven mitts on the this one! I think I have a bit of a burn on my thumb from this little operation.
Even though I got the center hole right it looks like the hole for piston pin is a slip fit instead of a press fit (prior to having my mill and the reason for not drilling more holes in the cylinders) so I'm thinking I'll use some green Loctite to secure the pin in the crank. I haven't found any of the green stuff in town so it looks as if I'll have to order some. FYI - When I say "green Loctite" I'm looking at Loctite 680 "retaining compound" as opposed to 290 or 294 "thread lockers". Feel free to comment on my choice of Loctite products as I'm no expert.
Here's where I'm at...
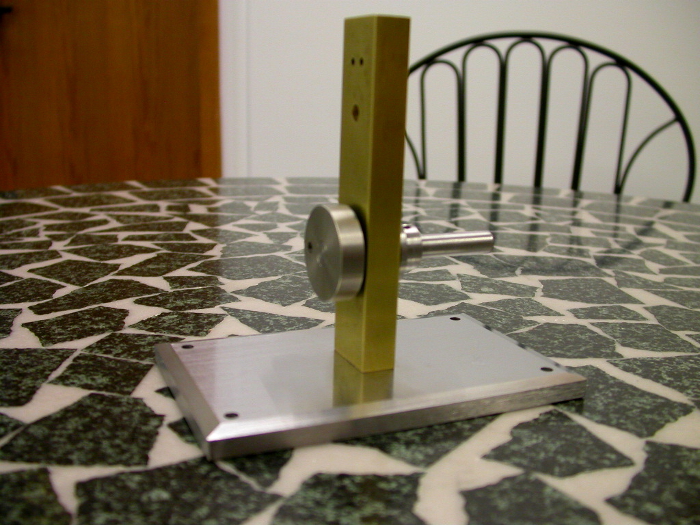
-Ron
Even though I got the center hole right it looks like the hole for piston pin is a slip fit instead of a press fit (prior to having my mill and the reason for not drilling more holes in the cylinders) so I'm thinking I'll use some green Loctite to secure the pin in the crank. I haven't found any of the green stuff in town so it looks as if I'll have to order some. FYI - When I say "green Loctite" I'm looking at Loctite 680 "retaining compound" as opposed to 290 or 294 "thread lockers". Feel free to comment on my choice of Loctite products as I'm no expert.
Here's where I'm at...
-Ron
Wells-Index 860 Mill
South Bend 11" Lathe
Queen City Shaper
South Bend 11" Lathe
Queen City Shaper
-
ScrapMetal - Site Admin
- Posts: 225
- Joined: Thu Feb 02, 2012 3:39 am
Re: Where are we at?
![]() by Hawkeye » Sat Apr 19, 2014 8:31 pm
by Hawkeye » Sat Apr 19, 2014 8:31 pm
I got about the same done. I figured I'd try a drop of blue lock-tite to hold the crank pin. I can always re-do it later if I need to.
You do not have the required permissions to view the files attached to this post.
Mike
-

Hawkeye - Posts: 44
- Joined: Sun Feb 05, 2012 10:04 pm
- Location: Kelowna, BC, Canada
Re: Where are we at?
![]() by Hawkeye » Sun Apr 20, 2014 6:33 pm
by Hawkeye » Sun Apr 20, 2014 6:33 pm
I got a few more things done today, before my 'shop energy' ran out. I got the cylinder cap made and bolted on, and the cylinder drilled and threaded.
The next step is to match the piston to the cylinder bore. Then drill the bottom of the piston for the crank pin. The last step will be to make an adapter to bring air or steam into the top of the column.
The next step is to match the piston to the cylinder bore. Then drill the bottom of the piston for the crank pin. The last step will be to make an adapter to bring air or steam into the top of the column.
You do not have the required permissions to view the files attached to this post.
Mike
-
Hawkeye - Posts: 44
- Joined: Sun Feb 05, 2012 10:04 pm
- Location: Kelowna, BC, Canada
Re: Where are we at?
![]() by ScrapMetal » Mon Apr 21, 2014 4:55 pm
by ScrapMetal » Mon Apr 21, 2014 4:55 pm
Wow, that's coming along well. I have a question concerning the cylinder/piston matching. How are you planning to do it? This is my first "engine" build (of this type anyway ) so I've never had to fit a piston to a cylinder. I've got some ideas (how effective, I'm not sure) but any tips would be welcome.
Thanks,
-Ron
Thanks,
-Ron
Wells-Index 860 Mill
South Bend 11" Lathe
Queen City Shaper
South Bend 11" Lathe
Queen City Shaper
-
ScrapMetal - Site Admin
- Posts: 225
- Joined: Thu Feb 02, 2012 3:39 am
Re: Where are we at?
![]() by Hawkeye » Mon Apr 21, 2014 6:49 pm
by Hawkeye » Mon Apr 21, 2014 6:49 pm
I'm thinking I might try reaming the cylinder with a 10-under reamer, then skim the piston to a slip fit. In order to work on the piston, I'll have to make a split sleeve to go around the piston rod and go inside a 1/2" collet. Aluminum will be adequate for that.
If you don't have any reamers, the cylinder I got has a good, smooth finish. One option I was considering was to leave the cylinder and do all the fitting on the piston.
If you don't have any reamers, the cylinder I got has a good, smooth finish. One option I was considering was to leave the cylinder and do all the fitting on the piston.
Mike
-
Hawkeye - Posts: 44
- Joined: Sun Feb 05, 2012 10:04 pm
- Location: Kelowna, BC, Canada
Re: Where are we at?
![]() by Hawkeye » Thu Apr 24, 2014 10:23 pm
by Hawkeye » Thu Apr 24, 2014 10:23 pm
I ended up only getting an hour of work this morning, so I headed to the shop. Some careful measuring, plus the nice finish of the inside of the cylinder, led me to do the fitting by machining the piston. As mentioned, this requires a split sleeve to fit the piston rod.
Two light passes got the piston to a nice sliding fit.
I heated the flywheel in the oven for an hour at 275*, then pressed it onto the crankshaft with two 0.010" feeler gauges between the crank disk and the bearing. When the feelers were pulled out, the assembly had just the right amount of clearance.
The last piece was the fitting to bring air to the top of the column. I cut a length of 5/16" brass rod and used my new 5C spin indexer (Tool shipment arrived yesterday.) to mill two flats to allow use of a 1/4" wrench.
Then back to the lathe to drill a 3/32" hole 1 1/4" into the end of the rod. After that, slim down a short bit at the outboard end and thread to #10-32. Finally, an insert at an angle to form the barbs to hold the air hose.
Here's the finished engine. I applied a few psi of air pressure and gave the flywheel a spin. It was running right away. It will run down to 2 or 3 psi and really moves at 20 or 30. I made a short video, but trying to attach it results in losing everything I've already typed.
You do not have the required permissions to view the files attached to this post.
Mike
-
Hawkeye - Posts: 44
- Joined: Sun Feb 05, 2012 10:04 pm
- Location: Kelowna, BC, Canada
Re: Where are we at?
![]() by ScrapMetal » Tue May 06, 2014 9:11 pm
by ScrapMetal » Tue May 06, 2014 9:11 pm
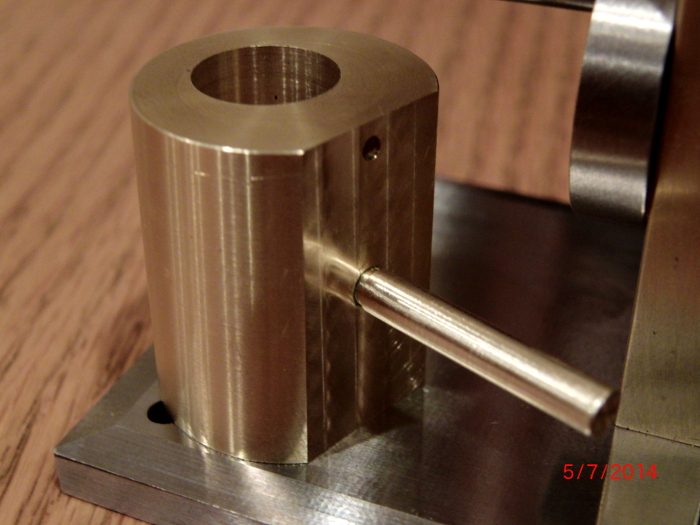
Nicely done Mike! I'm still trailing you a bit as I haven't had a chance to get in to the shop until earlier today. I drilled out and tapped the back of the cylinder. I probably sweated more over that setup than I have for many others. Small and "one shot to get it right" really works on my nerves. 
 I decided to do the drilling on my mill as I really don't trust my drill press/vise for accuracy. The mill, even without the DRO hooked up, I can just keep futzing with it until I get it right then hit the button. Here's a shot of the cylinder/shaft:
And the project as it now sits:
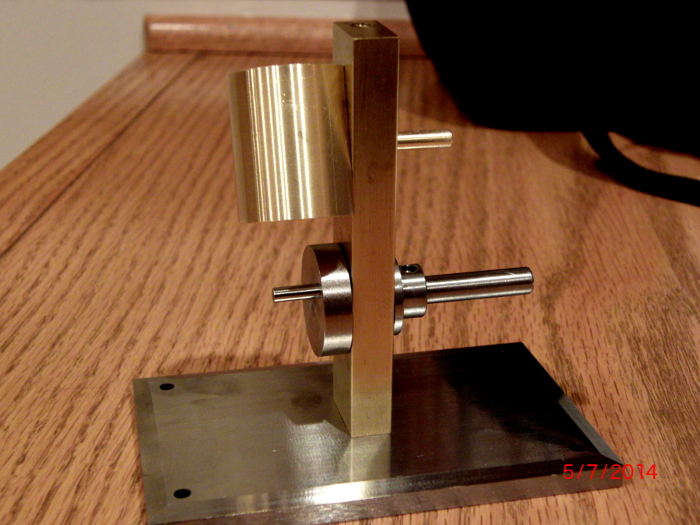
I think that I'll try and fit the piston to the cylinder before making the cap so I really appreciate the tips on getting that done. Thanks again Mike.
I'm hoping to have the rest of it done sometime this week.
Stay tuned for further developments ,
-Ron
And the project as it now sits:
I think that I'll try and fit the piston to the cylinder before making the cap so I really appreciate the tips on getting that done. Thanks again Mike.
I'm hoping to have the rest of it done sometime this week.
Stay tuned for further developments
-Ron
Wells-Index 860 Mill
South Bend 11" Lathe
Queen City Shaper
South Bend 11" Lathe
Queen City Shaper
-
ScrapMetal - Site Admin
- Posts: 225
- Joined: Thu Feb 02, 2012 3:39 am
Re: Where are we at?
![]() by ScrapMetal » Mon May 12, 2014 12:45 pm
by ScrapMetal » Mon May 12, 2014 12:45 pm
I went a similar (but slightly different ) route. Here are a couple shots of the fixture I made to hold the piston.
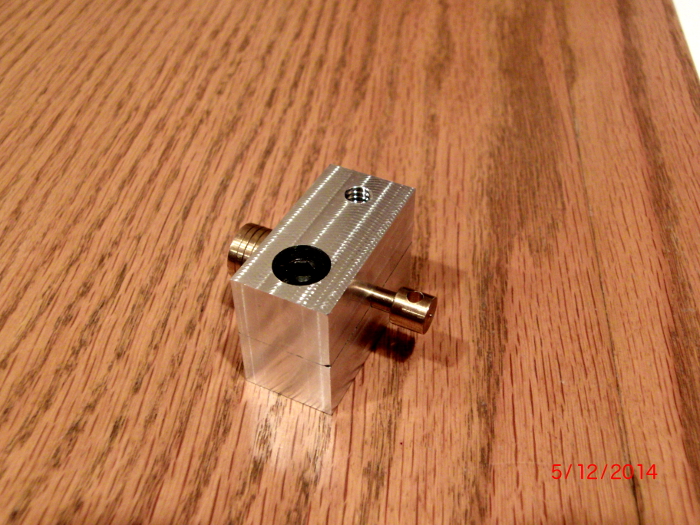
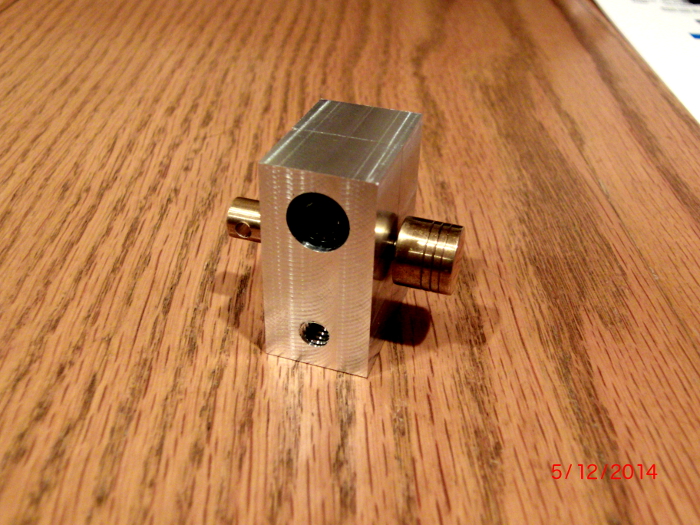
As you can see I've already drilled the hole for accepting the crank shaft. I ended up doing all the drilling on my mill. I started trying to use my HF drill press but it quickly became apparent how bad of p.o.s. it is. One of the smaller through holes went okay but when I tried the larger bit to give clearance for the cap screw head I got so much chatter the chuck dropped off it's taper. Same drill bit on the mill, smooth as silk. I'm definitely in the market for a better drill press!
I chose to use a "square" fixture as it will be relatively simple to put it in my 4-jaw on the lathe and get the head of the piston dialed in. I haven't decided on whether to try and take a cut on it (I like it just the way it is.) or to just use a file/sand paper then polish. There is so little material to be removed it's kind of a push either way.
-Ron
Wells-Index 860 Mill
South Bend 11" Lathe
Queen City Shaper
South Bend 11" Lathe
Queen City Shaper
-
ScrapMetal - Site Admin
- Posts: 225
- Joined: Thu Feb 02, 2012 3:39 am
Re: Where are we at?
![]() by ScrapMetal » Thu May 15, 2014 3:08 pm
by ScrapMetal » Thu May 15, 2014 3:08 pm
I finished fitting the piston to the cylinder. I only had to "breath on it hard" to size it and the three "ring grooves" are still intact. I also made the cap. I won't post pics of it until I get a chance to polish it up. When parting it off there was a bit of a "tail" left sticking out so I touched if off with a file. At the same time I put some ugly little scrapes on the surface so a picture of it will not go in the "official record", no pics - never happened. 
I only need to drill out the collet for the cylinder shaft and make some kind of air fitting for the top. Other than that I run in to a brick wall in that I need a 2-56 tap to thread the holes I drilled in the cylinder. Not many options to find one in town so I ordered a set off e-bay and it should be here in a few days.
I'll post back when I have something presentable to show.
-Ron
Wells-Index 860 Mill
South Bend 11" Lathe
Queen City Shaper
South Bend 11" Lathe
Queen City Shaper
-
ScrapMetal - Site Admin
- Posts: 225
- Joined: Thu Feb 02, 2012 3:39 am
Who is online
Users browsing this forum: No registered users and 5 guests