Replacing the "mule ears" on a Colt dbl barrel shotgun

Replacing the "mule ears" on a Colt dbl barrel shotgun

Postby ScrapMetal » Tue Jul 03, 2012 2:49 pm

Dealing with a little issue I'm having with Colt. I need to remove the mule ears to repair a broken spring on one and to replace both the "ears". As you can see, someone in the past has "repaired" it before and left it with mis-matched hammers.

Image

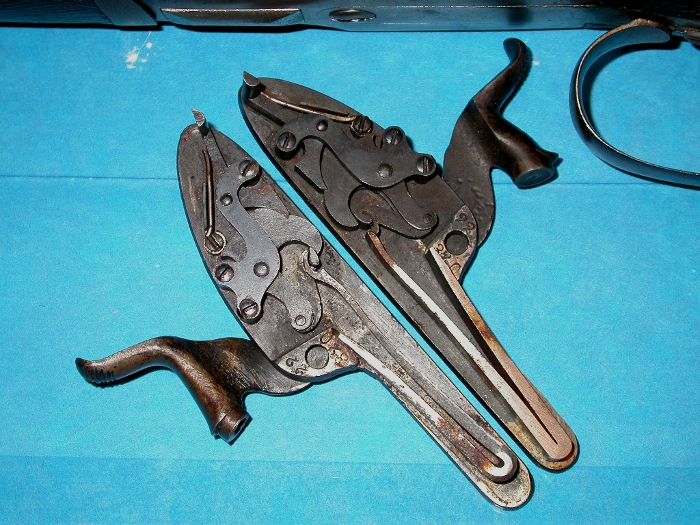
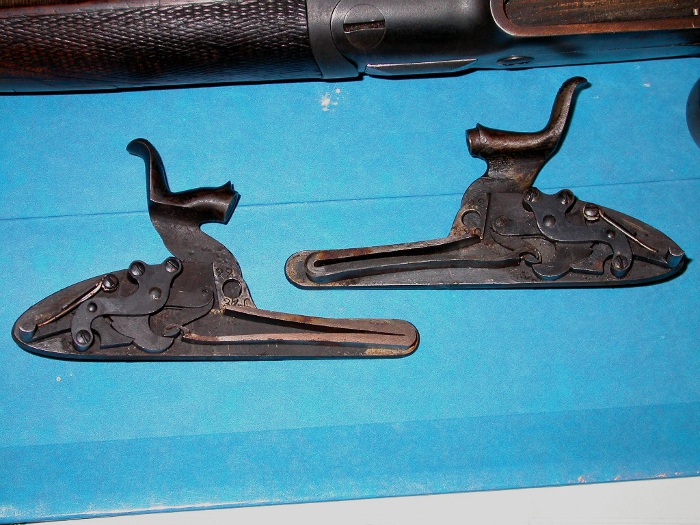
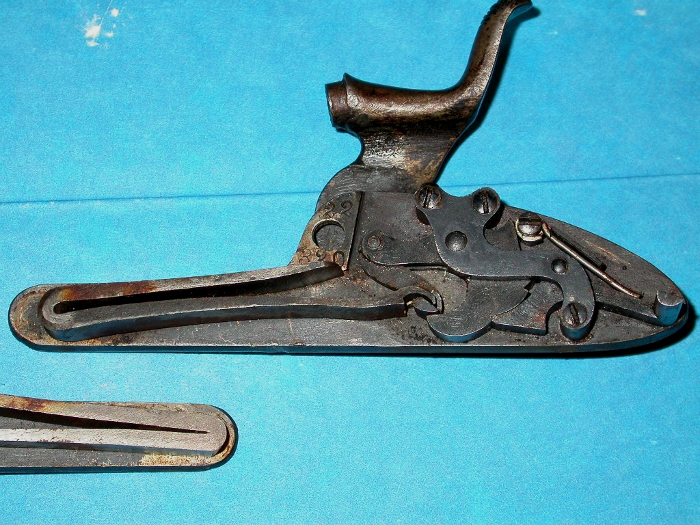
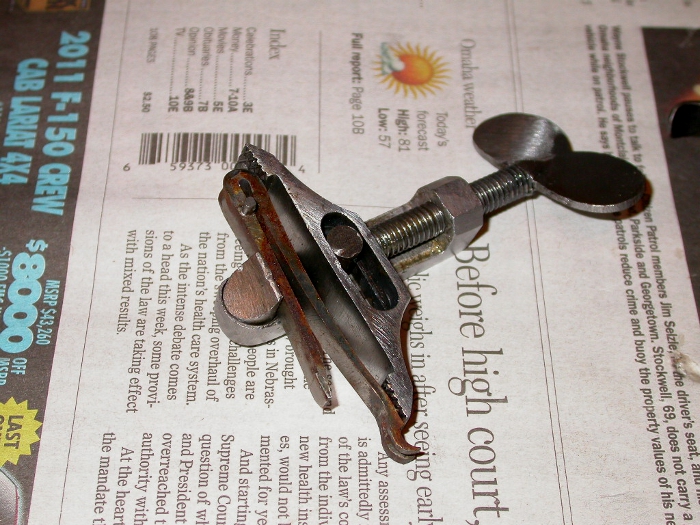
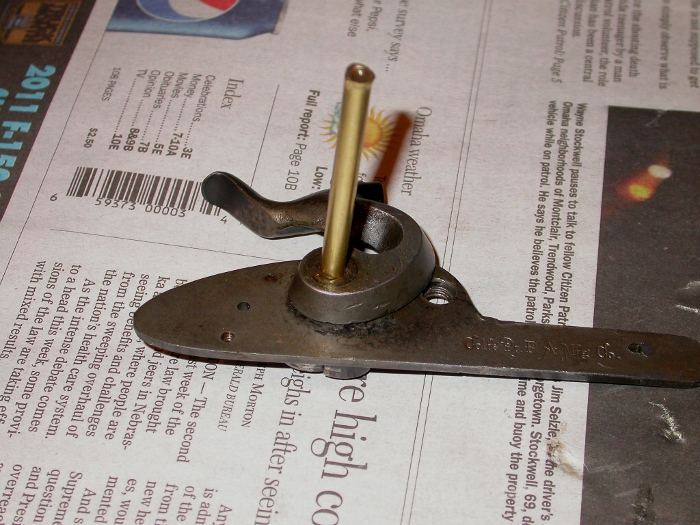
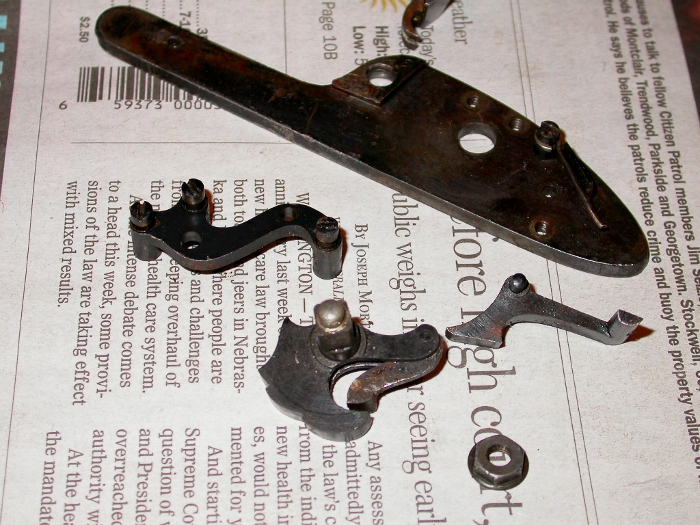
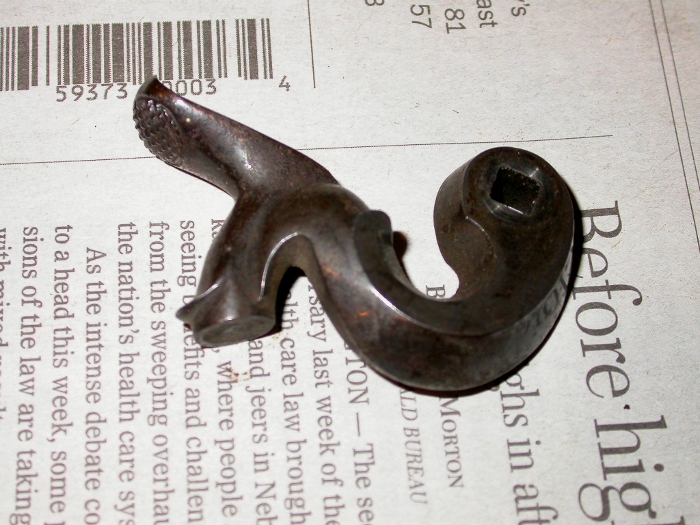
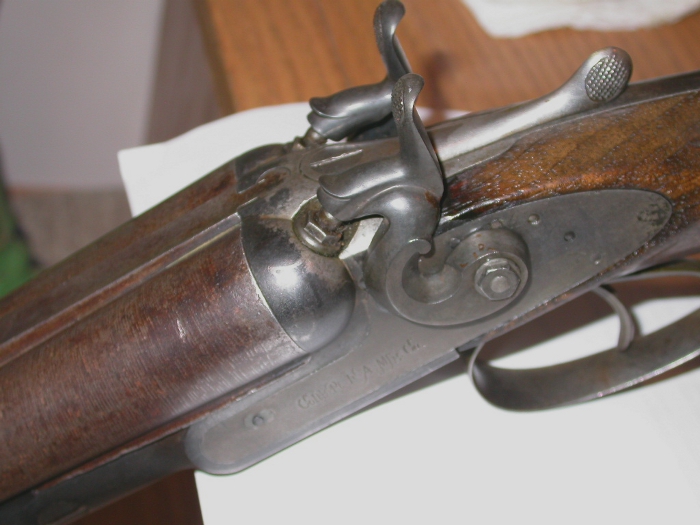
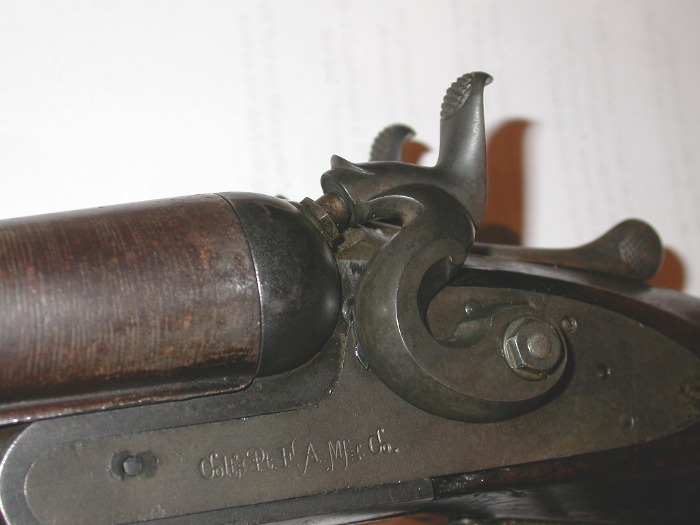
I have a matched set of the correct Colt hammers to replace them with but the hammers are on tight. The small hex nuts that are "holding them on" come off easily enough and the threads are fine but it seems that they are almost pressed on.

Image

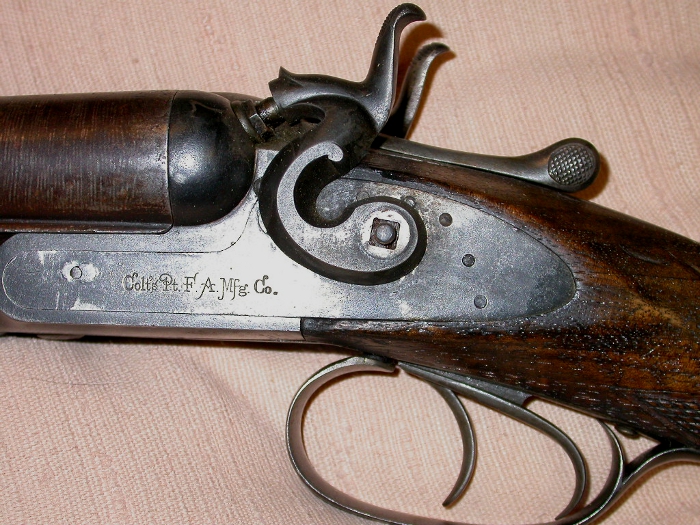
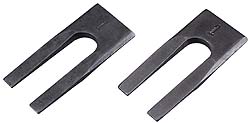
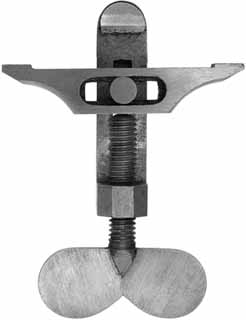
There are a few thousandths between the hammers and the side plates but not enough to get a real puller under there. I've considered trying thin strips of brass to make a "basket" around the post and yank on it but would rather find some better ideas. I'd really, really like to avoid jazzing up the side plates any more than they are.

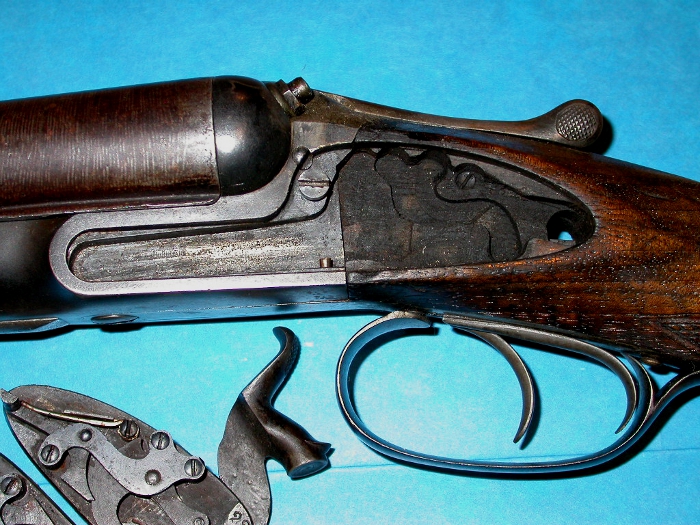
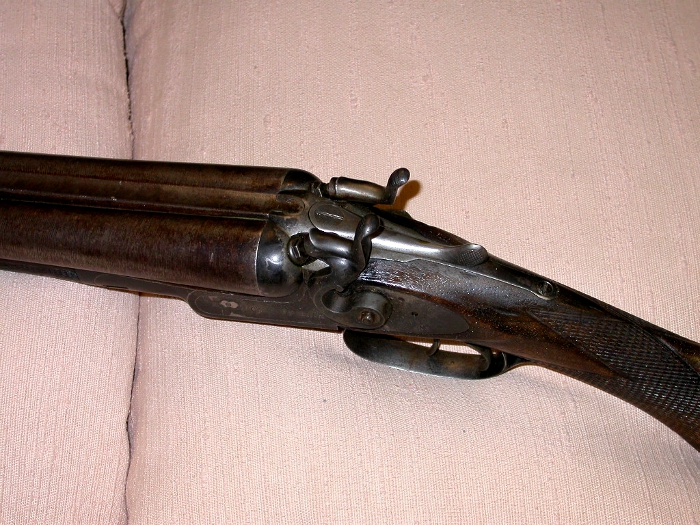
Note: Yes, I know it's a damascus barrel and no I don't plan on shooting it. (Well, not unless I have it checked out and also make some blackpowder loads for it. )

-Ron
Wells-Index 860 Mill
South Bend 11" Lathe
Queen City Shaper
User avatar
ScrapMetal
Site Admin
 
Posts: 225
Joined: Thu Feb 02, 2012 3:39 am

Re: Replacing the "mule ears" on a Colt dbl barrel shotgun

Postby ScrapMetal » Tue Jul 03, 2012 2:55 pm

Using wedges had crossed my mind but I was concerned that anything hard enough to work could put scrape marks in the old bluing. If I wasn't worried about the finish something like these Jacobs drill chuck wedges would be perfect.

Image

I like the idea of making a "pin" to thread onto the pivot. Seems like there would be less chance of slipping or deforming the square pivot post. I'll get out my thread gauges tonight and see where I'm at on it. I may try a combination of these two suggestions even. Not exactly a "wedge" but at least something to fit snuggly between the hammer and the side plate to direct the force (But Yoda... ) and keep the hammer from becoming skewed as it's forced off. Just in order to try and keep the square post as "square" as it should be. May be over-kill but I dearly love this gun and it would kill me to cause any harm to it. You know the feeling.

-Ron
Wells-Index 860 Mill
South Bend 11" Lathe
Queen City Shaper
User avatar
ScrapMetal
Site Admin
 
Posts: 225
Joined: Thu Feb 02, 2012 3:39 am

Re: Replacing the "mule ears" on a Colt dbl barrel shotgun

Postby ScrapMetal » Tue Jul 03, 2012 3:01 pm

Now, since I've never worked on this kind of action before, after getting some further information I find that I can pull both side plates/assemblies by just unscrewing the one screw on each plate, making life much easier. I had just figured that one would have to remove the hammers before pulling the side plates.

I haven't yet accomplished what I had originally set out to do but I have changed the working parameters a bit. Here is where it sits now...

(Just some "glamor" shots if you're interested in the inner workings.

Image

Going to find out if Evapo-rust will be safe on what bluing there is (doubt it) before trying to do anything with these. You can tell where the one spring has been replaced as you can still see a slight outline of the original. That and the replacement spring was made without quite as much care.

Image

A beautiful job on routing out the stock for the hammer mechanisms.

Image


Image

Still need to remove the hammers. :oops: :mrgreen:

-Ron
Wells-Index 860 Mill
South Bend 11" Lathe
Queen City Shaper
User avatar
ScrapMetal
Site Admin
 
Posts: 225
Joined: Thu Feb 02, 2012 3:39 am

Re: Replacing the "mule ears" on a Colt dbl barrel shotgun

Postby ScrapMetal » Tue Jul 03, 2012 3:05 pm

With help from some more knowledgeable folks I was steered towards a "mainspring vise". Anything to keep this old girl in good condition. *Warning: Possible rhetorical question here - Hmmm, now, do I buy one or make one...

They aren't really expensive but they are a fairly simple design. Here's a "deluxe" model from "Track of the Wolf" http://www.trackofthewolf.com/List/Item.aspx/1038/1:

Image

Feck! I could really use my shaper or future mill now.


Thanks,

-Ron
Wells-Index 860 Mill
South Bend 11" Lathe
Queen City Shaper
User avatar
ScrapMetal
Site Admin
 
Posts: 225
Joined: Thu Feb 02, 2012 3:39 am

Re: Replacing the "mule ears" on a Colt dbl barrel shotgun

Postby ScrapMetal » Tue Jul 03, 2012 3:09 pm

Decided to order the mainspring vise rather than build one (Hey, the deluxe model was only $20. ) as I wanted to get done with this project so I could get back to my bigger ones. The vise is a little rough but for what it cost I can't really complain. I'm putting the making of one on my "list" for a rainy day. Here it is with the spring removed.

Image

I reamed out the inside of a piece of brass tubing so it would just fit over the threaded part of the square post.

Image

I put a small piece of "U" channel in my vise to support the side plate and lightly drove the post through the hammer.

After dis-assembly:

Image

Now the "new" hammers that I'm installing. I test fitted the hammer to the post and was surprised beyond belief as it snugs up perfectly. I bought these hammers at a gun show some years ago and while I am sure that they came from the Colt factory, I don't believe they've ever been installed on a gun. They show no signs of wear and the hammer face is unmarked as it has never hit the striker. OEM parts from 1878! The only thing that needs to be taken care of is that they do have a bit of surface rust just from sitting around. You can't tell from the pics but the case hardening looks great even.

Image

Image

Well, parts are sitting in the Evapo-rust. I figure that if it does end up taking the bluing off the mechanism I can always re-blue those parts before assembly.

-Ron
Wells-Index 860 Mill
South Bend 11" Lathe
Queen City Shaper
User avatar
ScrapMetal
Site Admin
 
Posts: 225
Joined: Thu Feb 02, 2012 3:39 am

Re: Replacing the "mule ears" on a Colt dbl barrel shotgun

Postby ScrapMetal » Tue Jul 03, 2012 3:12 pm

Most of the work went well (in other words, nothing was destroyed ). The Evapo-rust effectively removed much of the remaining bluing, as expected, so I did a quick and mild re-blue of all the parts, side plates included.

The picture didn't come out too well with the flash. All that shiny stuff and little spots is just an effect from the flash on the oil.

Image

This pic makes them look a lot darker than they really are. I think that once I get the hammers pressed back on all the way and the assemblies re-installed on the gun they'll fit in much better.

Image

I'll post more once I get the gun cleaned up a bit and the plates re-installed.

-Ron
Wells-Index 860 Mill
South Bend 11" Lathe
Queen City Shaper
User avatar
ScrapMetal
Site Admin
 
Posts: 225
Joined: Thu Feb 02, 2012 3:39 am

Re: Replacing the "mule ears" on a Colt dbl barrel shotgun

Postby ScrapMetal » Tue Jul 03, 2012 3:14 pm

And here we come full circle. I won't bother to post pics of the process I used to get the hammers back on (I didn't take any ) but all that I did was to take two small pieces of scrap "aircraft" plywood, drill a small hole half way through one for the threaded post to fit in. I then put the hammers in the wife's toaster oven and set it for 250 F (she was asleep by this time ;) ). After letting them sit for fifteen minutes or so to make sure they had reached the proper temperature, I put on my welding gloves and made sure there was some oil on the post itself. I placed the undrilled ply against the mechanism, placed the heated hammer on the post and used the second piece of ply against the hammer so that it's blind hole was over the threaded part of the post. A small "C" clamp was then placed over the whole conglomeration of stuff making sure to line up the center of the clamp pads on the axis of the post and pressed the hammer back on to it's square shaft.

The end results...

Image

Image

Image

The barrel doesn't really look that red or "rusted" but the camera somehow brings it out.

Now I'm trying to convince my wife that this gun really should be displayed prominently on the wall along with a couple of my old Winchesters and Colt pistols. She's not quite sold on the idea yet.

-Ron
Wells-Index 860 Mill
South Bend 11" Lathe
Queen City Shaper
User avatar
ScrapMetal
Site Admin
 
Posts: 225
Joined: Thu Feb 02, 2012 3:39 am

Re: Replacing the "mule ears" on a Colt dbl barrel shotgun

Postby Turbinedoctor » Wed Jul 04, 2012 6:14 pm

Very nice work there. I don't have one for a project but I like the way you went about getting it done. Thanks for sharing.
Durwood
Turbinedoctor
 
Posts: 65
Joined: Thu Feb 02, 2012 5:33 am

Re: Replacing the "mule ears" on a Colt dbl barrel shotgun

Postby rleete » Thu Jul 05, 2012 5:43 am

That is a nice looking piece. Glad you fixed it.
Homier Speedway 7x14 lathe
Grizzly G8689 Mini Mill
HF 4x6 Bandsaw, bench grinder and more
Years of experience wrecking things
rleete
 
Posts: 62
Joined: Thu Feb 02, 2012 5:22 am
Location: Rochester, NY

Re: Replacing the "mule ears" on a Colt dbl barrel shotgun

Postby ScrapMetal » Thu Jul 05, 2012 2:33 pm

Thanks guys. It's a little bit of OCD, especially with my guns. Things just have to be "correct" or it bugs the heck out of me.

-Ron
Wells-Index 860 Mill
South Bend 11" Lathe
Queen City Shaper
User avatar
ScrapMetal
Site Admin
 
Posts: 225
Joined: Thu Feb 02, 2012 3:39 am


Return to Firearms

Who is online

Users browsing this forum: No registered users and 3 guests

cron